


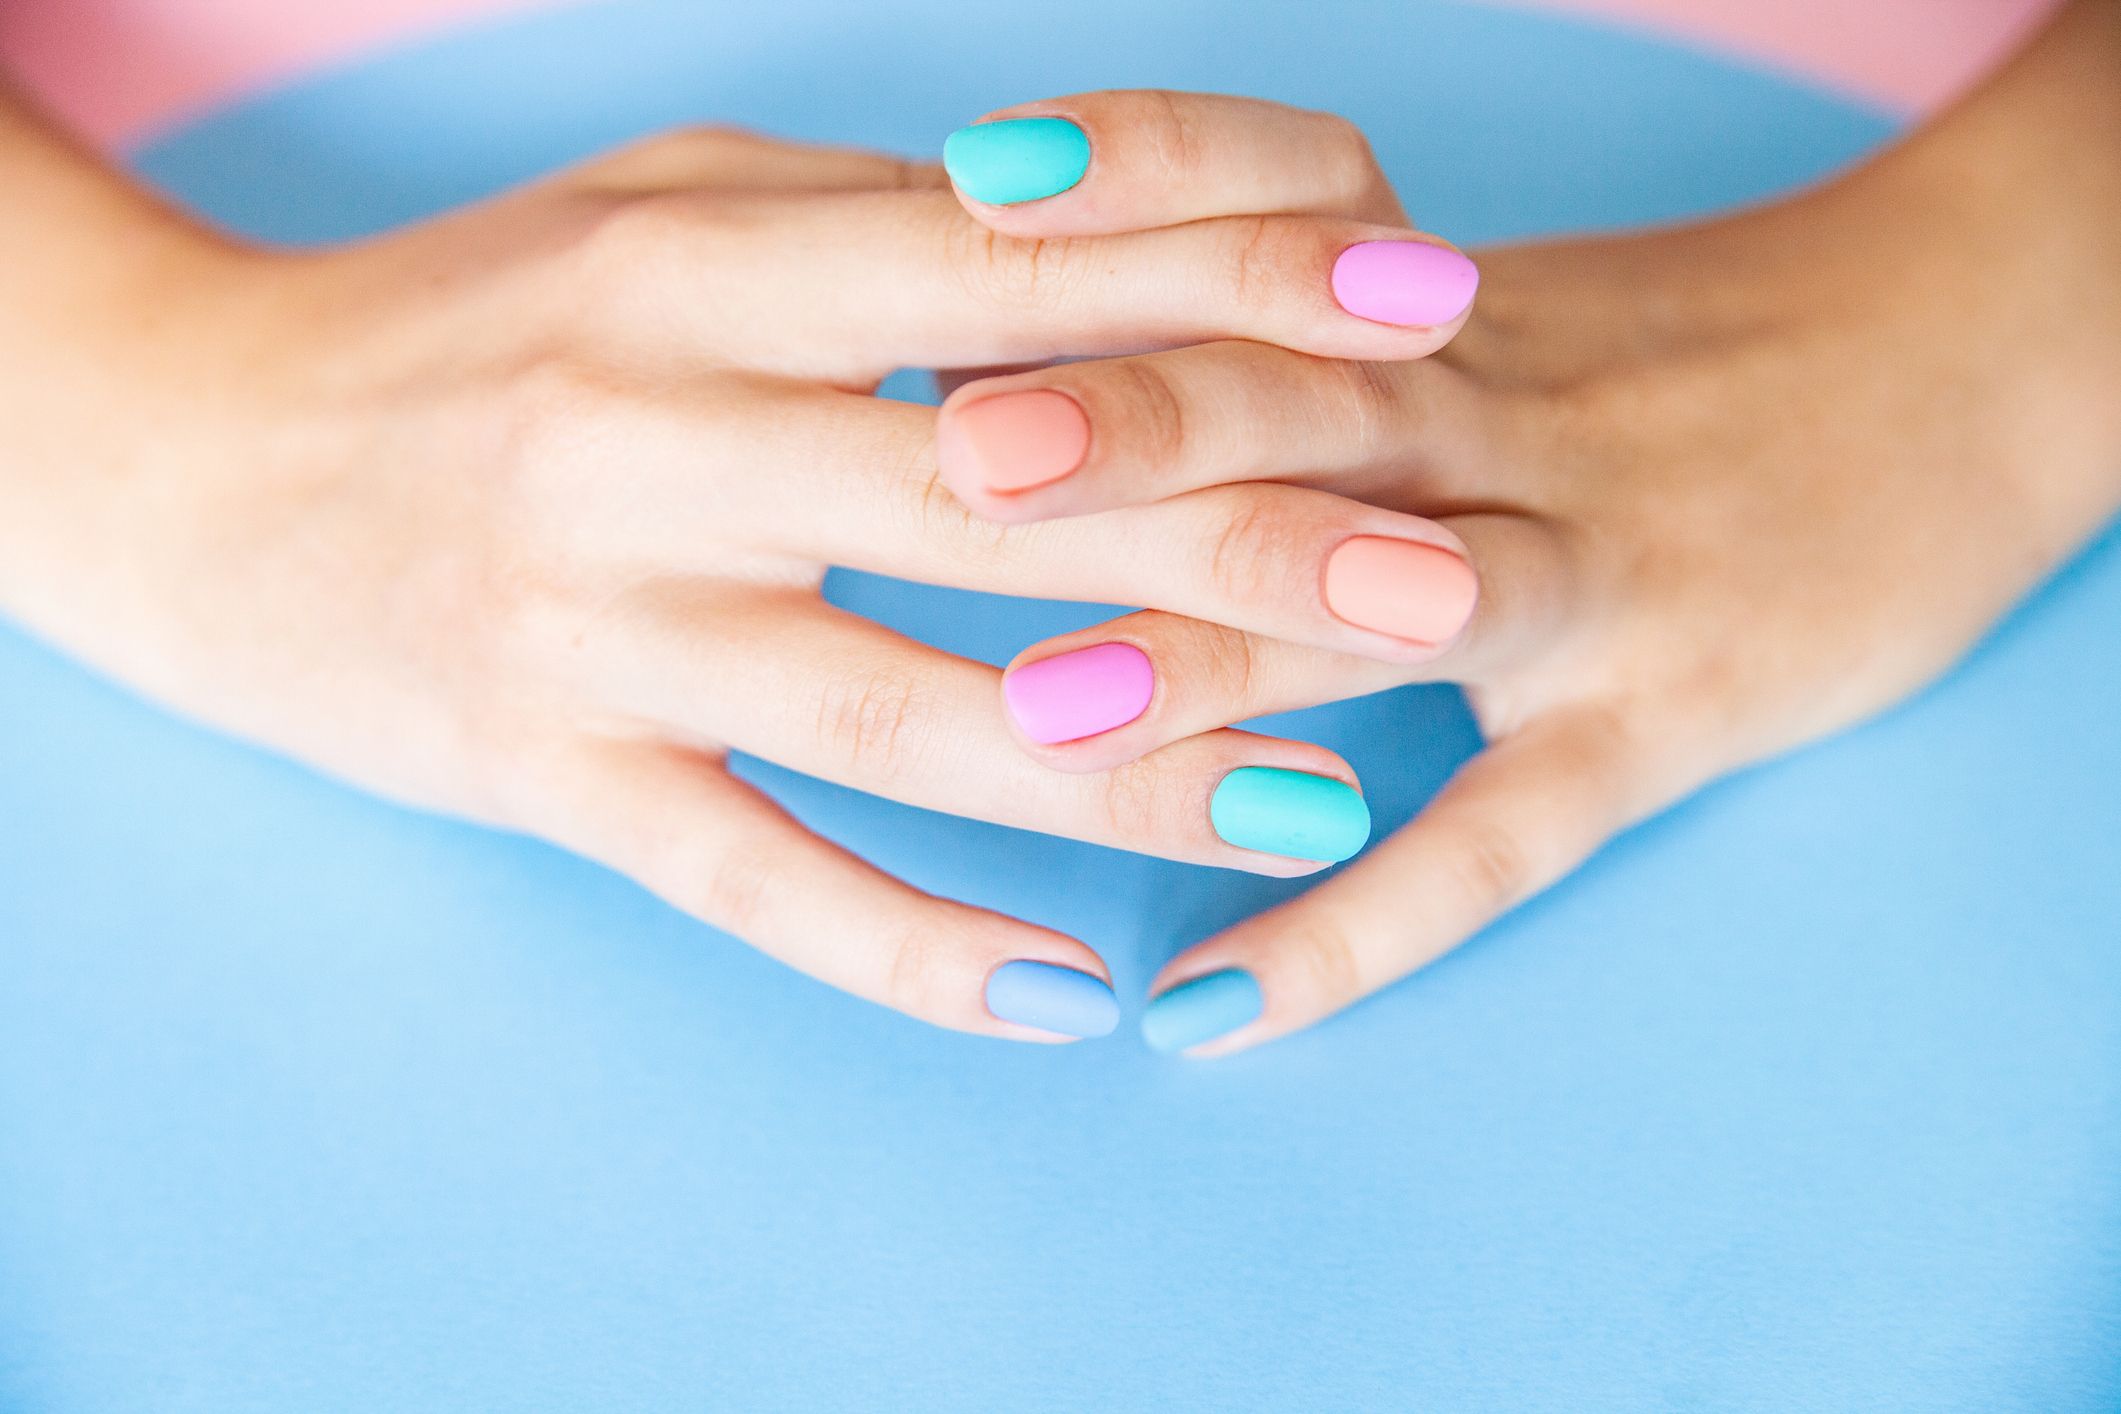
Stylish and sturdy, gel nails take quite a bit of work to apply. With the right tools and techniques, you’ll be able to create a professional-looking gel manicure. To add length and drama, glue on a set of nail tips before applying the gel. You’ll need to use a buffing block to roughen up the shiny surface from both your natural nails and the tips, but once you do this you can apply all of the gel layers from your cuticle to the free edge of the fake nail tip. Cure the gel under a UV or LED nail lamp and don’t forget to fix up the edges with a nail file before finishing off your manicure.
Prepping Your Natural Nails
Start with clean, polish-free nails. Before starting the manicure, remove any old nail polish, gel nails, or tips. Use acetone to get rid of any traces of the old manicure and then wash your hands so you have a blank canvas to create the new manicure on.
Wipe off nail polish with acetone and a cotton pad.
Wrap old gel nails in acetone-soaked cotton pads before scraping the gel off.
Get rid of any old tips and leftover nail glue in an acetone soak.
Push back your cuticles with a cuticle pusher. If you’d like to soften your cuticles first, soak your hands in warm water for 5 to 10 minutes. Then gently press a cuticle pusher against the thin layer of cuticle skin to push it back against your nail fold. Expose as much of your natural nail as possible so the gel nails will last longer.
You can use either a metal or plastic cuticle pusher or an orangewood stick to push back your cuticles.
Trim off any hangnails with a cuticle trimmer if necessary.
Wait to apply cuticle oil until after you’ve finished your nails so the oil doesn’t prevent the polish from sticking properly.
Buff the surface of your natural nails with a 150-grit buffer block. Hold the buffer block parallel to each nail plate and work in strokes to gently rub the block against your nail. Continue buffing your nails until the entire surface is slightly dull.
By doing this, you’ll roughen up the smooth, shiny texture to help the gel adhere.
Gel won’t bond with a shiny nail surface so be sure to dull down the entire nail plate, including the sides and edges.
Wipe your nails with gel cleanser to remove dust and oils. Saturate a cotton pad with a gel cleanser and rub it across the surface of each nail. Continue wiping until all of the buffing dust and any remaining natural oils are gone.
Dust and natural oils will interfere with the gel’s ability to bond to your natural nail, so it’s essential to cleanse your nails before applying any nail glue or gel.
Applying the Tips
Choose natural or clear tips in your desired shape and length. Based on the manicure style you’re going for, choose from any of the available nail tip lengths and shapes, making sure to use either clear or natural tips.
Popular nail tip shapes include coffin, almond, stiletto, square, rounded or oval, and squoval.
These typically come in lengths of extra-short, short, medium, long, and extra-long.
Avoid using white tips since these require much more preparation to get the gel to bond
Assign 1 nail tip to each of your natural nails, matching the widths. Pick up a set of 10 or more tips at a local beauty store or order them online. From the set, assign 1 tip to each of your natural nails. To do this, find a tip that perfectly matches the width of your natural nail. The edges of the tip should line up perfectly with the sidewalls of your natural nail.
If you choose a set with more than 10 tips, you’ll have more sizes to choose from. This can be helpful if you’re not sure what widths you’ll need.
Glue the tips onto the ends of your natural nails. Brush a small amount of nail glue into the well on the underside of the first nail tip. Press the entire well area down onto your natural nail tip, keeping the sides of your nail and the tip in perfect alignment. Hold the tip in place for between 5 to 10 seconds until the bond is secure. Then proceed to apply each of the remaining 9 nail tips to the corresponding natural nails.
Make sure the entire well area overlaps with your natural nail for the most secure application.
Use a rocking motion as you press on the nail tip to squeeze out any air bubbles from the glue.
Buff the surface of the nail tip to eliminate the shine. Use a 150-grit file to buff the surface of the nail tip, just as you did for your natural nails. Work in gentle strokes to build up a textured, dull surface.
While buffing the surface of the tip, you can also shape up the edges with the file as well, if desired.
At this point, the entire surface of your natural nail and nail tip should be dulled down.
Remove the dust using gel cleanser and a manicure brush. Saturate a cotton pad with gel cleanser and wipe down each nail to eliminate any remaining dust from the buffing. Then follow up with a manicure brush to swipe off any remaining dust and residue from your nail area.
Adding the Gel
Paint on a thin base coat of primer gel from your cuticle to the free edge. Use a flat, narrow brush to scoop up a small bead of primer gel or base coat get. Apply it to each nail a thin layer. Place the brush at your cuticle and pull the product across your natural nail and the tip until you reach the free edge (i.e. the very end of the nail tip).
Start with 1 stroke in the center of your nail and then work parallel strokes on either side.
Choose a primer gel from the same manufacturer of the gel you’ll be using for the best results.
You can pick up a complete gel kit from a beauty supply store or online retailer. Look for one containing all the necessary materials, from the primer gel and brushes to the hard or soft gel, top coat, and drying lamp.
Allow the primer gel to cure under a UV or LED nail lamp. Place your primed nails under the drying lamp. Switch the lamp on an run it for 1 drying cycle. The amount of curing time will depend on what type of gel and nail drying lamp you’re using. Follow the curing times recommended by the gel and lamp manufacturers for the best results.
An LED lamp will cure the gel more quickly than a UV lamp.
For reference, you may need to wait around 2 minutes for the primer to cure under a UV lamp.
Under an LED lamp the curing time may be closer to 30 seconds.
Pick up a bead of gel and place it down onto your nail with a brush. To make the first coat thicker than the second, start with an apple seed-sized bead of gel. Holding the brush parallel to your nail, lay the gel down in the center. Leave a little space between the gel and your cuticle.
You can use either hard gel or soft gel formula to build up the gel nail.
During gel application, be careful not to get any gel on your surrounding skin or else it will peel off.
Spread the gel across your entire nail to complete the first coat. Gently push the gel back towards your cuticle to fill in around the cuticle. Pull the brush in the opposite direction, toward the free edge, to divide the bead of gel in half. Then distribute the gel on either side of your nail using the brush. Make sure the first coat covers the sidewalls and the free edge.
On the left and right sides of the nail shimmy the brush towards the side of your nail.
Don’t press down on your nail with the brush as you apply the gel. Instead, think of the gel as a cushion between your nail and the brush; you’re just distributing it lightly with the brush
Cure the first coat of gel under the lamp. Once you’ve applied the first coat of gel to each nail, place the nails under the UV or LED nail drying lamp. Run the lamp for the necessary curing time, based on the manufacturer’s recommendations.
For an LED lamp, cure the gel for at least 30 seconds. For a UV lamp, wait at least 3 minutes.
To avoid smudging the gel, complete the first coat on 1 hand then cure it under the lamp before moving onto the other hand.
Apply a thinner second coat over the first and allow it to cure. Scoop up another small bead of gel with the brush. Hold the brush parallel to the surface of your nail and gently press down near the cuticle. Distribute the gel in steady strokes, starting in the center and moving to either side, while keeping light contact between the brush and the gel itself.
Aim to build up a smooth, even arch across the center of your nail.
Allow the second coat to cure for about 2 minutes under a UV lamp, or about 30 seconds under an LED lamp.
File and dust off the gel nail to smooth out any imperfections. If you notice any bumps or flaws along the edges of the gel where it covers the nail tip, rub a nail file across the sides and free edge. Use the file and gentle pressure to gradually soften and buff away any imperfections. Then wipe away the dust with a gel cleanser-soaked cotton pad and a manicure brush.
Note that you shouldn’t try to re-shape the nail tip at this stage; that should be done prior to gel application. This step is just for finishing off the cured gel.
Paint on a topcoat of finishing gel and allow it to cure. Use a brush to sweep a thin coat of finishing gel from your cuticle to the free edge, starting in the center and then moving to either side of your nail. After applying the topcoat to each nail, cure your nails under a UV or LED drying lamp for the manufacturer’s recommended timeframe.
After curing the gel topcoat, feel free to add a coat of standard nail polish or nail art elements if you’d like.


